Create Edge Animations Filmstrips
An Edge Animations filmstrip is a series of videos and images that you have put together into one animation. You can choose to save or publish your filmstrip as a video, or simply play the filmstrip immediately without saving any changes.
It is your responsibility to secure authorization for any copyrighted material you use in your publications.
Open Edge Animations
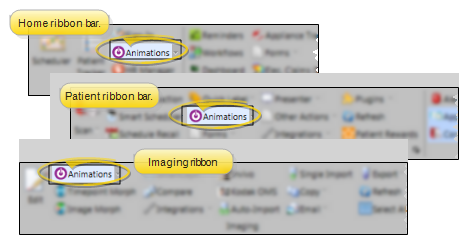
Select the Animations icon from the Home, Patient, or Imaging ribbon bar. You can also open this feature from the Quick Access toolbar at the top of your Edge Cloud system window.
If you plan to work on or present filmstrips that contain images or treatment information about a specific patient, open the patient folder first, then launch Edge Animations. This way, you can integrate the patient's images into your filmstrip and customize them with patient findings.
Create or Load a Filmstrip
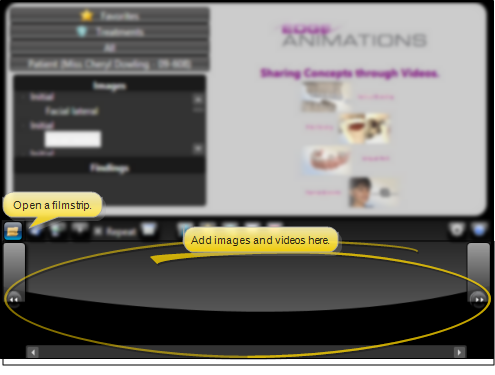
When you first launch Edge Animations, the filmstrip area at the bottom of the window is blank. You can either start creating a new filmstrip from scratch, or click Open from the filmstrip ribbon bar to load an Edge Animations filmstrip that you have already saved.
Add Content to Your Filmstrip
Add Patient Images
You can add patient images from Edge Imaging into a filmstrip, either as hard-coded images or as templates that will be replaced with the active patient's picture.
Add an Image to a Filmstrip
Open the Patient list at the left side of the Edge Animations window, and double-click the image you wish to add. That image is hard-coded into the filmstrip.
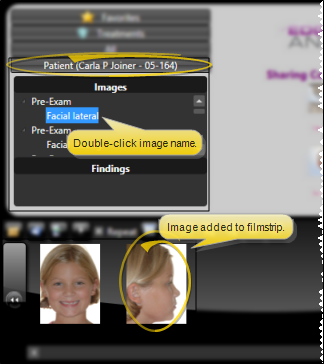
This option is available only if you launched Edge Animations from a patient folder.
Adjust Image Properties
Right-click an image and select Properties. You can flag the image as a template so it is replaced with the active patient's picture when you open the filmstrip for someone else. You can also choose a different image type and timepoint.
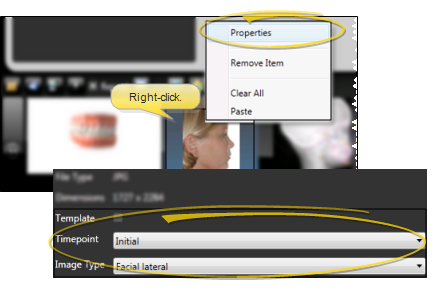
When you open the filmstrip for a different patient, and that patient does not have an Edge Imaging image that matches the template's image type and timepoint, the image will be blank in the filmstrip.
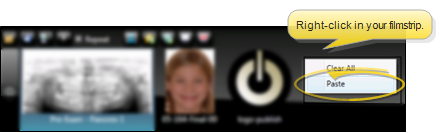
Copy / Paste Images
You can copy and paste any image from your computer, from Edge Imaging, or from the Internet into your Edge Animations filmstrip.
- Right-click the image you want to use and select Copy
- Right-click in your Edge Animations filmstrip bar and select Paste
The image will be hard-coded into the filmstrip.
When you copy and paste an image, it is hard-coded into the filmstrip. You cannot turn that image into a template.
Add Edge Animations Videos
Select the All tab at the left of your Edge Animations window, then double-click the video you want to add. You can also use the search box to locate videos by name or description.
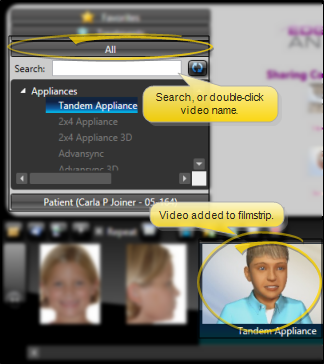
Videos that you have not downloaded appear dimmed in the list. If you have enabled the Exclude Stereo Videos option in your settings, those files will not appear in the list.
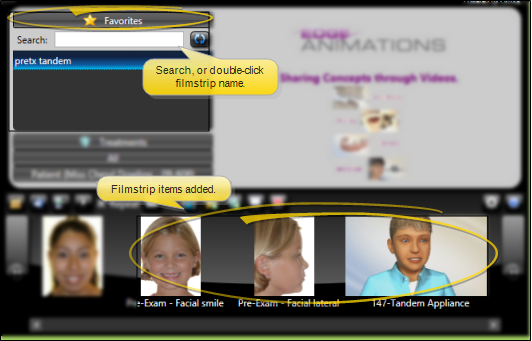
Add Saved Filmstrips
To add the contents of another filmstrip into the one you're working on, select the Favorites or Treatments tab, then double-click the filmstrip to add.
Each frame of the selected filmstrip is added individually to the end of your new filmstrip.
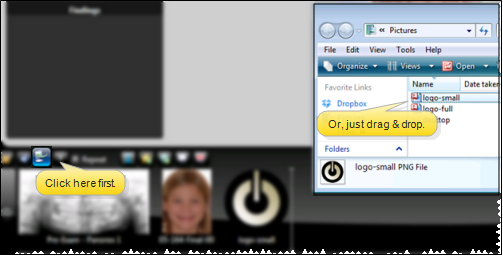
Import External Media
You can import image or video files in .jpg, .png, .wmv, .mp4, .mod, .mov, or .avi format.
Click the Import icon from the filmstrip toolbar and choose your file, or simply drag and drop the file into your filmstrip.
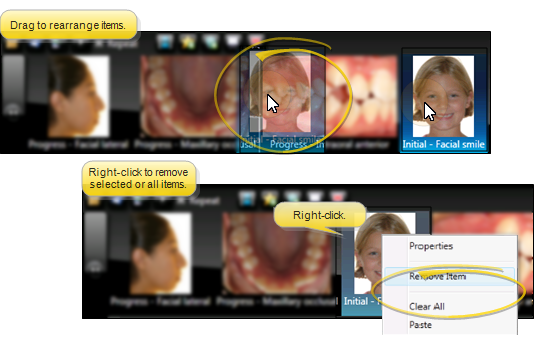
Rearrange and Remove Items
- Rearrange: Drag and drop items to reorder them
- Remove: Select an item and press Delete, or right-click to remove
All items are removed from the filmstrip bar when you load a saved filmstrip file.
Filmstrip Properties
Open the Properties window from the filmstrip ribbon bar to configure name, description, background music, and volume settings.

Name & Description
The filmstrip name is used as the filename when you save. Enter a description that helps you identify the filmstrip's purpose.
Background Music
Select a soundtrack (.mp3 or .wav) to play along with your animation. The track will play only after the video is published.
You can set a default audio file in Edge Animations settings, or choose a different audio file for individual filmstrips in Properties.
Background music set in Settings will overwrite any track set in individual Filmstrip Properties.
Volume Settings
- Video Volume: Controls the voice-over track
- Background Volume: Controls the background music track
- Annotation Volume: Controls voice recordings you've made for filmstrip images
Save Your Filmstrip
Click Save from the filmstrip ribbon bar to save your work as an XML file. By default, filmstrips are saved in the Jobs folder.
When you Save a filmstrip, you create an XML file that you can later open for editing. When you Publish a filmstrip, you create a video file that can be played outside of Edge Animations.
Save to Favorites or Treatments
Click Add to Favorites or Add to Treatments to save the filmstrip to those lists. Filmstrips saved this way can be added to other filmstrips.

Next Steps
- Edit Filmstrips - Add annotations and effects
- Play Filmstrips - Present to patients
- Publish & Share - Export as video files