Edit Timepoint Properties
While in imaging Edit mode, you can use the Timepoint tools in the Actions section of the Imaging ribbon bar to rename a patient's timepoint, edit a timepoint date, or delete an entire timepoint from the patient record.
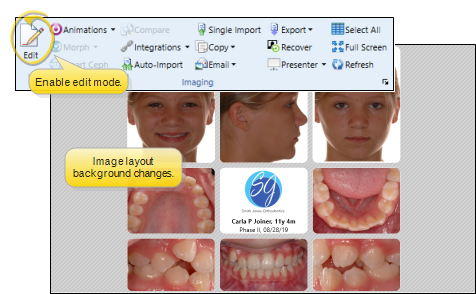
Enable Image Editing Tools
To use image editing tools, enable the Edit icon from the Imaging section of the ribbon bar. Then, select the image you want to work with. Your Edge Imaging background changes slightly to indicate when you are in Edit mode.
Editing mode is not available from cardflow layouts. You can, however, maximize individual images in a cardflow layout to edit them.
Edit Timepoint Properties
Choose the timepoint to work with. You can use the arrows beside this field to progress through all available timepoints. The date appears along with the timepoint description to help identify the timepoint you want. Then, click the Timepoint Properties icon in the Actions section of the Imaging ribbon bar.
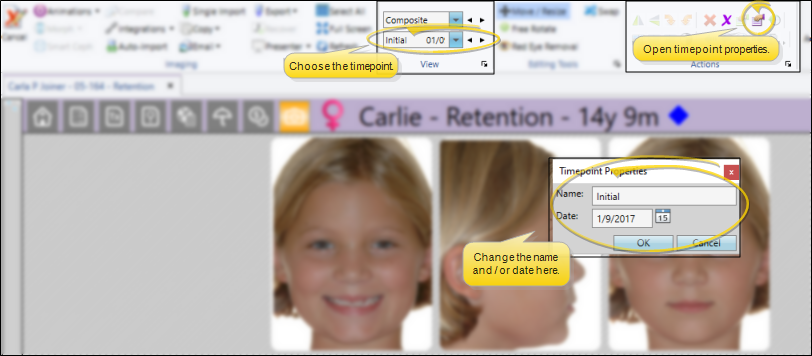
Edit the Timepoint Name (Use with Caution)
After all images have been uploaded to the timepoint, you can safely edit the name.
Unwanted results will occur if you change the name, then attempt to upload additional images to this timepoint,
Edit the Timepoint Date
You can the date for this timepoint as needed. However, this does not change the Date Taken setting of individual images in the timepoint. To change the date of individual images, use the Image Properties tool from the in the Actions section of the Imaging ribbon bar.
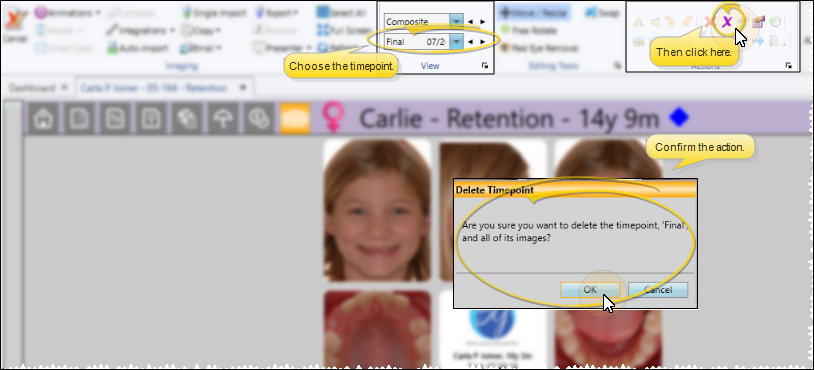
Delete a Timepoint
Choose the timepoint to work with. You can use the arrows beside this field to progress through all available timepoints. The date appears along with the timepoint description to help identify the timepoint you want. Then, click the Delete Timepoint icon in the Actions section of the Imaging ribbon bar. This deletes the timepoint and all related images from this patient record. This tool is most useful if you accidentally imported images into the wrong patient folder. The deletion is not permanent unless you save your changes before you exit the Editing window.
Save Changes
Click Save in your Quick Access toolbar or File ribbon bar (or press Ctrl+S on your keyboard) to save any changes you have made. If you are in Edit mode, and have enabled the Exit Edit on Save setting in your Imaging User Options, you return to viewing mode after saving the image. Otherwise, you remain in Edit mode, where you can make more changes as needed.
Cancel Changes
Click Cancel in the Imaging section of the ribbon bar to exit editing mode, ignoring any unsaved changes.
If you edit an image in error, you can use the Undo toolsin the Actions section of the Imaging ribbon bar to reverse individual changes while still in editing mode, and the Restore tool to revert an image to its original imported state even after you save changes.