Edit Edge Broadcast Newsletter Contents
Use the Edge Broadcast newsletter editor to enter text, hyperlinks, images, and social media posts you want to deliver to your patients, parents, and professional associates. We recommend you stick to your message, and keep your newsletter layout and text simple. Note that background images, animated GIFs and embedded video are not fully supported.
Once you send a newsletter, we suggest you no longer edit it, so that you have an accurate record of the content that was sent. Instead, create or clone a new Edge Broadcast newsletter for your next publication.
This article talks about creating and editing the content of your newsletter, that is, the text, images, hyperlinks, and social media posts. To work with the newsletter name, email subject and description, open the Newsletter Settings window instead. See "Edge Broadcast Newsletter Settings" for details.
Open Edge Broadcast Service
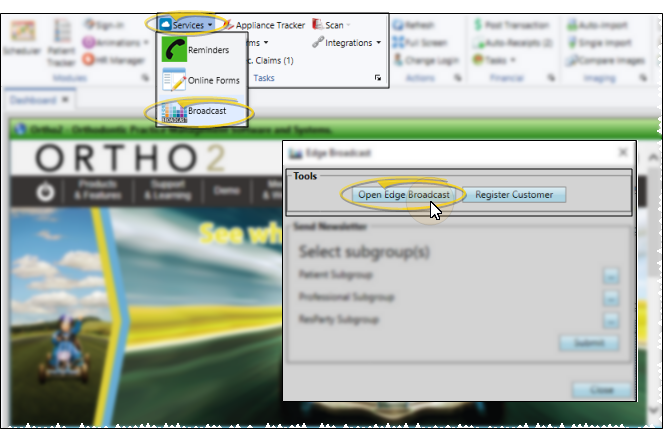
Select Services from the Tasks section of the Home ribbon bar and choose Broadcast. Then choose the Open Edge Broadcast option from the Tools section of the window. Or, navigate to https://edgebroadcast.ortho2.com. The Edge Broadcast application main window will open in your default browser.
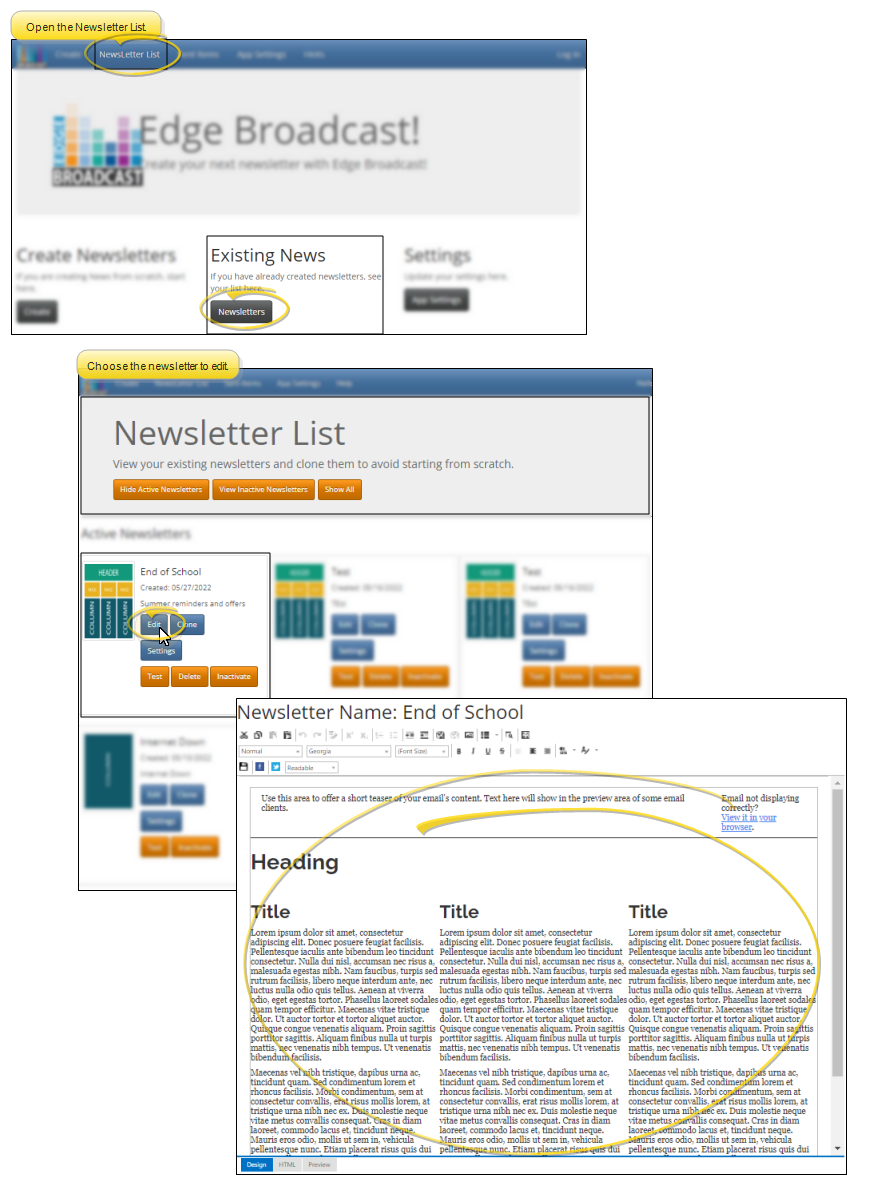
Open the Newsletter Editor
The editor opens automatically after you confirm the newsletter settings for a new newsletter; or, you can open it for an existing / cloned newsletter from the Newsletter List.
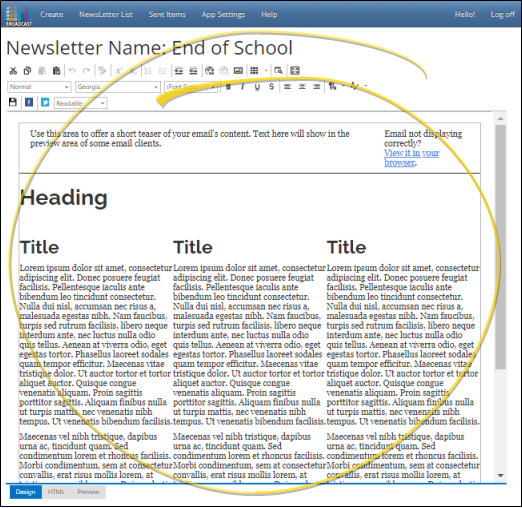
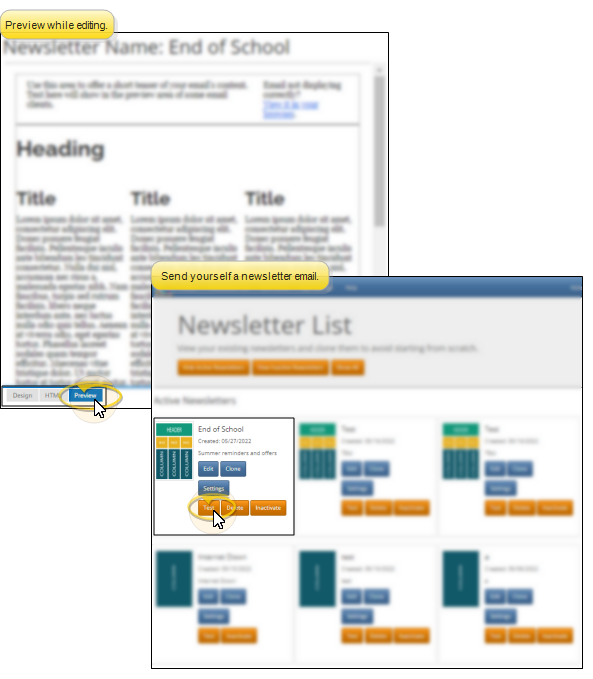
Design / HTML / Preview Mode
Use the tabs at the bottom of the window to select your editing / viewing mode. Most people will use only the Design and Preview modes.
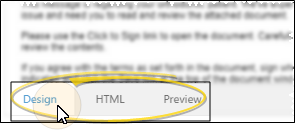
Design - Use this tab to edit and format text, insert images and hyperlinks, and use other design tools.
HTML - Do not use this tab unless you are extremely comfortable with editing HTML code. Even small errors could prevent your newsletter from functioning correctly.
Preview - Click the Preview tab at the bottom of with window to see what your document will look like. You cannot use any editing tools while in this mode.
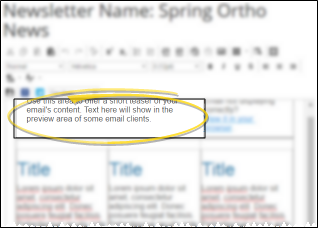
Teaser Text
By default, the top of your newsletter template includes a teaser sentence, intended to pique the interest of your readers. Be aware that some recipients will see this text as their email preview.
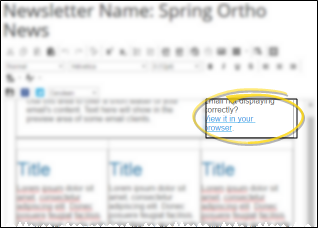
Browser Link
By default, the top right of your newsletter template includes a link that recipients can click to open the newsletter in a web browser, instead of their email window. We highly recommend that you keep this link intact, especially if you make extensive use of images and hyperlinks in your newsletters.
Newsletter Text
Replace the headings, titles, and text in the template with the text of your own articles. You can type your text directly into the newsletter template, or copy and paste text from another source, such as a word processor, into your newsletter.
Straightforward articles that stick to the message, and simple designs that minimize visual clutter are the most efficient to create, and the most effective way to present your message to your clients.
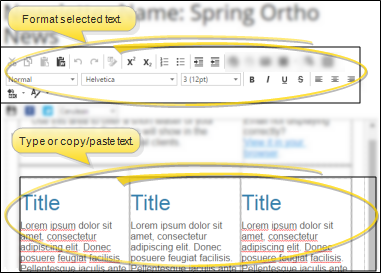
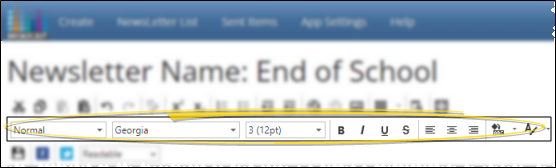
Format Your Text
You can use the formatting tools at the top of the page (or standard word processing keyboard shortcuts) to format your text, such adding as bold, italics, font, size, and color, just like a word processor. Article headings, titles, and body text default to the styles of the template theme you selected.
We suggest you use the style column (i.e. "Normal") as much as possible, instead of individual format settings, to maintain consistency throughout your publication. In addition, if you change the theme, any text that is associated with a style is updated to the new theme automatically, while text that you have formatted manually will not be updated.
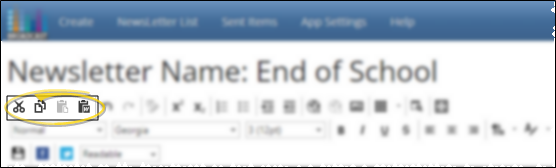
Copy / Paste Text
You can type your text, or use the icons on the toolbar, or use standard word processing shortcuts (i.e. Ctrl+C to copy and Ctrl+V to paste) to cut, copy, and paste text, including its properties, into your document. Alternately, you can use the Paste from Word icon to remove the text font before pasting.
It is your responsibility to secure authorization for any copyrighted material you use in your publications.
Hyperlinks
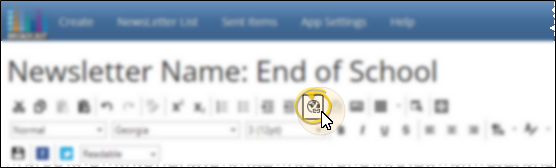
You can include hyperlinks in your documents that open a website, such as your practice home page or a relevant YouTube video, or to open a new email message. You might use the email link, for example, to encourage readers to contact you. To open the hyperlink window, select the text to use as the hyperlink hotspot, or position your cursor where you want the link to appear, then click the Hyperlink icon from the toolbar (or press Ctrl+K on your keyboard)
Insert a Website Link
Enable the URL option, then enter the details. Be sure the website address for the link includes "http://" or "https://"
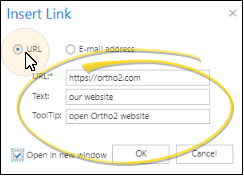
URL - Enter the web address where you want to send readers when they click on the link, including the leading "http://" or "https://".
Text - This hotspot text defaults to the text you selected to be the hyperlink hotspot. If you change the text, the original text you selected will change as well.
ToolTip - This is what pops up on the screen when a reader hovers over the hotspot without clicking it.
Open in New Window - Enable this option to open the website in a new browser window when the reader clicks the hotspot. Otherwise, clicking the link will close your document and open the linked website in the same window.
Insert an Email Link
Enable the Email Address option, then enter the email details.
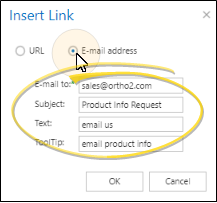
Email To - Enter the email address to whom you want to send a message when readers click on the link. Readers will be able to see this address in the email message.
Subject - Enter the default subject for the email message. Readers can change the subject if they wish before sending the message.
Text - This hotspot text defaults to the text you selected to be the hyperlink hotspot. If you change the text, the original text you selected will change as well.
ToolTip - This is what pops up on the screen when a reader hovers over the hotspot without clicking it.
Remove a Hyperlink - You can use the Unlink icon in the toolbar (or press Ctrl+Shift+K) to remove a link without removing the link text.
Images
You can add images to your newsletter to gain reader interest or to clarify a point of text.
Depending on your template, your newsletter may have image placeholders indicating the place and size of suggested images If you replace a placeholder with an image of a different size, your newsletter will look a little different than the original template. Also, empty placeholders will leave blank spaces in your newsletter: Be sure to either replace all placeholders with images, or remove empty placeholders before publishing your newsletter.
Open the Image Editor
Position your cursor where you want to insert an image, then click the Image icon from the toolbar (Or press Ctrl+G on your keyboard.) Or, double-click or right-click an existing image or placeholder to open the image editor. The image will be inserted at your cursor location, but you can drag it anywhere within the document.
![]()
Choose the Image to Use
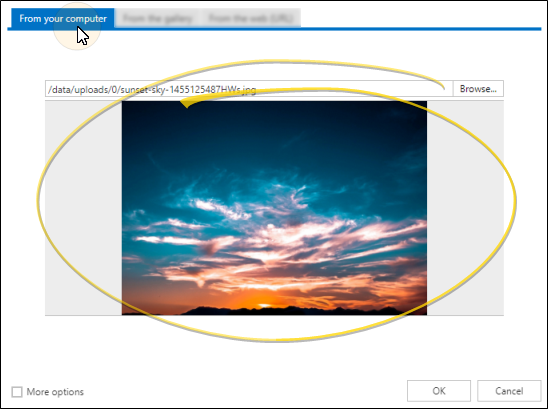
From Your Computer – Select this tab, then browse to the image file on your computer. Or, drag an image from your computer onto the Insert Image window. Once you use the image in a newsletter, it will be copied to the Image Gallery for future use.
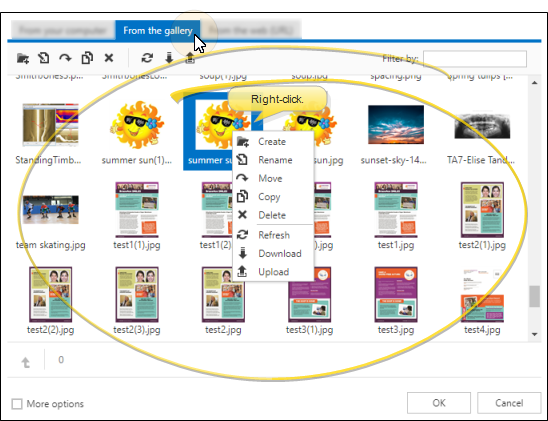
From the Gallery – Select this tab, then click to choose the image you want to use. Any image you have already used is stored in the gallery (with the exception of URL images that are inserted with the Save File to Server option disabled). To manage the images in the gallery, you can use the toolbar at the top of the window, or right-click an image to create folders within the gallery, and rename, move, copy, delete, and download the images. You can also upload images to the gallery that you have not yet used, so that they are easily accessed later.
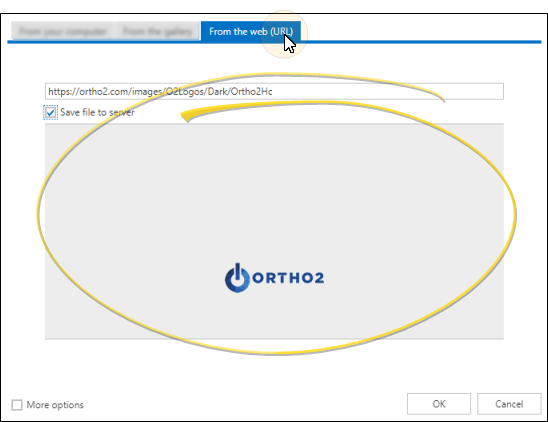
From the Web (URL) – To use an image from the Internet, right-click the image on the web page and select Copy Link Address. Then, select this tab, and paste the copied URL into the space provided. To save the image in the gallery for future use, enable the Save File to Server option.
It is your responsibility to secure authorization for any copyrighted material you use in your publications.
Common Settings
Enable the More Options checkbox at the bottom of the window, then use the Common Settings tab to set the size, text features, and description.
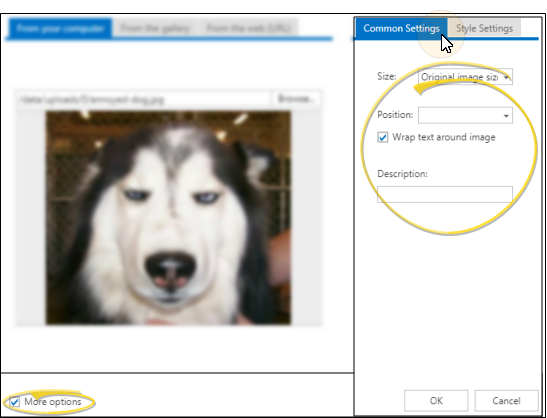
Size - Select to use the image in its original size, or select Custom Size to change the image width and height. If you want to change the width and height proportionally, be sure the aspect ratio tool is enabled (locked). To change the width and height independently of each other, disable (unlock) the aspect ratio tool. You can click Refresh to revert the image to its original size. In addition, you can enable the Create Thumbnail option and enter a file name to create a copy of the original image with the new dimensions (which is most often smaller than the original image size).
Position / Wrap Text - Choose to position the image at the left or right edge of the column, or centered within the column. Enable the Wrap Text option to surround the image with text where possible; disable the option to display text above and below the image, but not around it. To change the location of the image, simply click and drag it within the newsletter template.
Description - Enter a brief description of this image. If the image does not appear in the newsletter email, this description will appear instead.
Style Settings Tab
Enable the More Options checkbox at the bottom of the window, then use the Style Settings tab to set the margins, border, and image style.
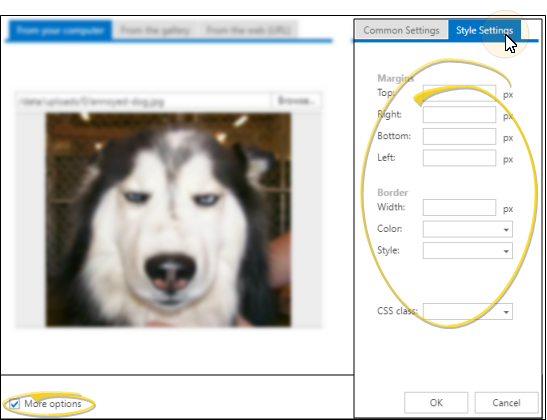
Margins - Use these fields to adjust the amount of space around each edge of the image.
Border Width - Use this field to define the thickness of the border around all edges of the image.
Border Color - Select the color for the image border.
Border Style - Choose from among several styles, such as "dotted", "solid", or "ridge" to further define what the image border looks like. We suggest you select one border style and use it for all of the images in the document.
CSS Class - If you have a cascading style sheet associated with your document, you can use this field to select the style to apply to the image.
Social Media Posts
Click Facebook or Twitter from the newsletter editor toolbar, then enter your Facebook or Twitter details to automatically insert recent posts into your newsletter.
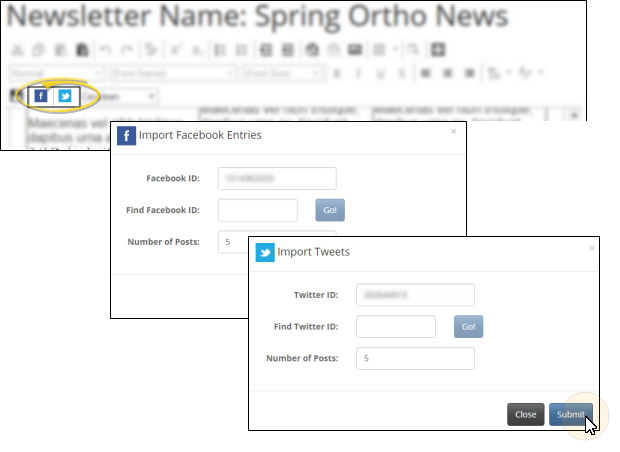
Facebook ID / Find Facebook ID
Entering your Facebook ID (not your page name) in your Edge Broadcast settings allows you to import social media posts into your newsletters. If you don't know your ID, type your Facebook page name in the Find Facebook ID field (if you don't know your name, go to your Facebook page, copy the information after .com/, and paste it into the Find Facebook ID field). Then, click Go! Your ID is then entered into the field above. You can optionally enter the social media IDs while editing a newsletter template.
Twitter ID / Find Twitter ID
Entering your Twitter ID (not your handle) in your Edge Broadcast settings allows you to import social media posts into your newsletters. If you don't know your ID, type your Twitter "handle" in the Find Twitter ID field (if you don't know your handle, go to your Twitter page, copy the information after .com/, and paste it into the Find Twitter ID field). Then, click Go! Your ID is then entered into the field above. You can optionally enter the social media IDs while editing a newsletter template.
Number of Posts
Enter the number of most recent posts to import into your newsletter.
Submit
After entering your ID and the number of posts you want to import, click Submit. The most recent posts are inserted at your cursor position, one after another. You may now use editing tools to move the imported text and graphics to other locations in your newsletter, if you like.
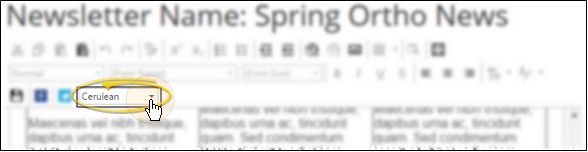
Theme
Changing the newsletter theme updates the styles used for titles, headings and body text. If you have manually edited the font, size, or color of any text in your newsletter, those items will not be updated when you change the theme. Only titles, headings, and body text that are linked to styles will be updated to the new theme.
Preview / Test Your Newsletter
Click the Preview tab at the bottom of window while editing your newsletter to see what it will look like in a reader's Internet browser, and to test your hyperlinks. You can click Test from the Newsletter List window, then enter an email address (such as your own address) to see what the newsletter email message will look like when someone receives it. See "Manage Edge Broadcast Newsletters" for details.
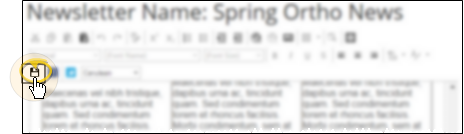
Save Often
ClickSave often while editing your newsletter. Clicking the Back button in your browser does NOT save your changes, but cancels any changes you have made.