Get Started with Edge Reminders
There are several steps you need to do to get started with Edge Reminders, including setting up your messages, choosing your message delivery protocol, listing your default patient preferences for sending Edge Reminders messages, and confirming that you have set up your patient and responsible party contacts to receive the messages.
Optional Module: Requires Activation - Edge Reminders is an optional module that requires activation by Ortho2. If you do not yet have the module, please contact your Ortho2 Regional Manager.
Set Up the Integration
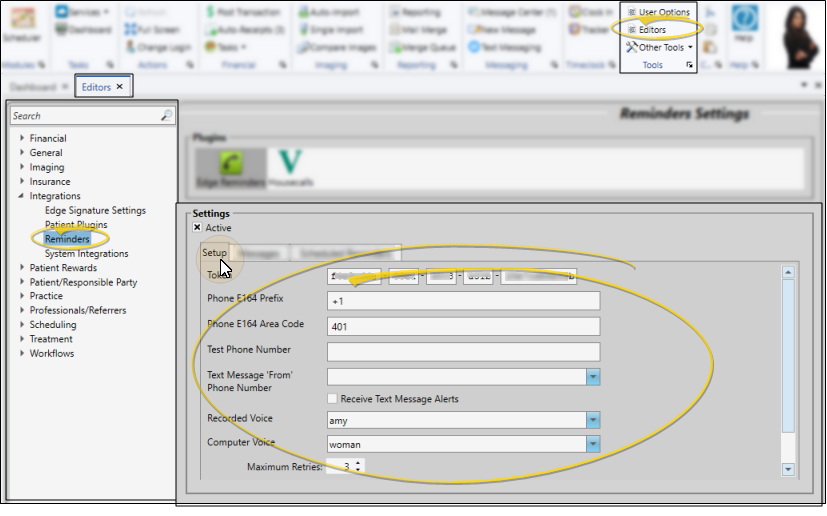
Use the Setup tab of the Reminders editor to activate your Edge Reminders integration, select your texting phone number, choose the telephone voice, and set up how many times to retry failed messages. See "Set Up the Edge Reminders Integration" for details.
Set Up Your Messages
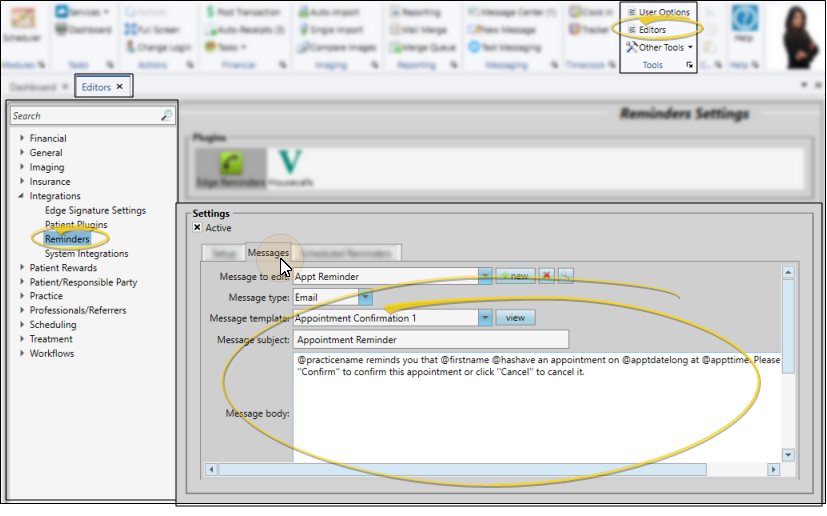
Use the Messages tab of your Reminders editor to create and edit the Edge Reminders messages you send via email and text message. (To create and update telephone voice messages, contact Ortho2.) See "Set Up Edge Reminders Messages" for details.
Set Up Scheduled Reminders
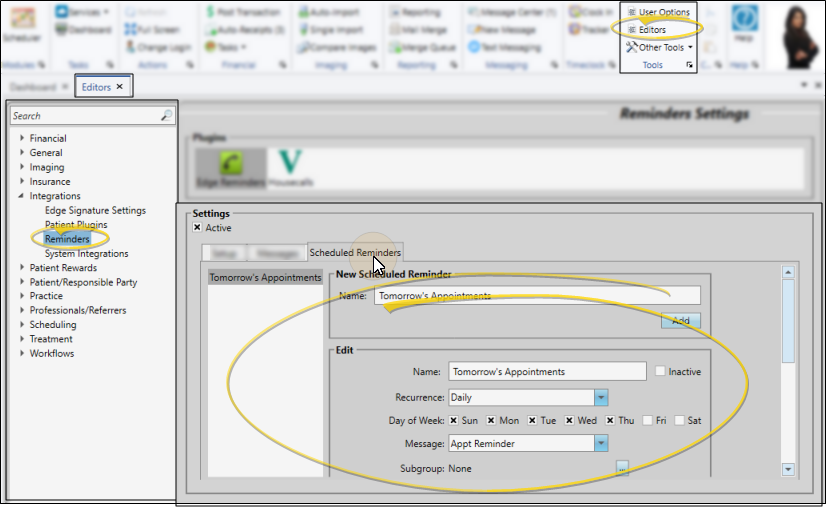
Use the Scheduled Reminders tab of your Reminders editor to schedule recurring messages, such as daily appointment reminders, and weekly birthday reminders. See "Set Up Scheduled Reminders" for details.
Set Up Contacts for Edge Reminders
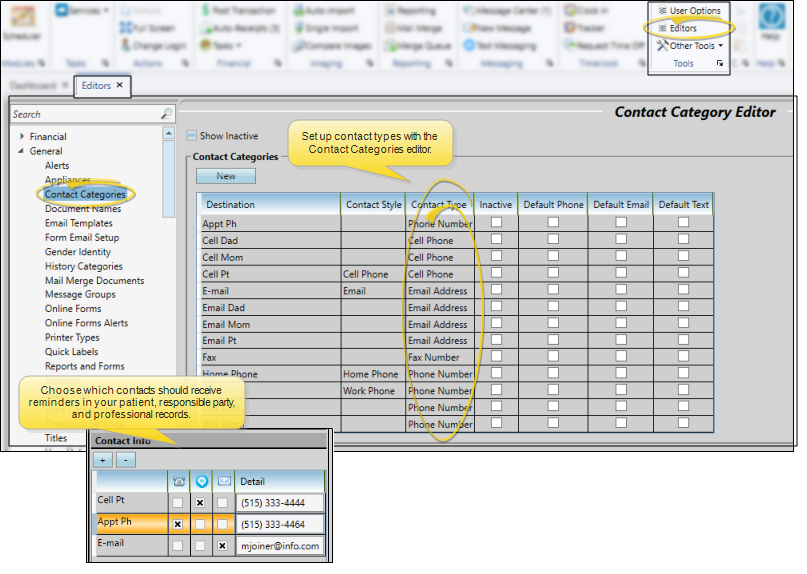
Simply having a valid email address, phone number, or cell phone number in the patient or responsible party record is not enough to receive Edge Reminders messages. You need two more things: 1) Your Contact Categories editor must identify contact descriptions as "Phone Number", "Cell Phone" and "Email Address" and 2) The contact information in the patient, responsible party, or professional record must use an identified contact description from the editor, and be enabled to receive Edge Reminders messages. See "Set Up Contacts for Edge Reminders" for details.
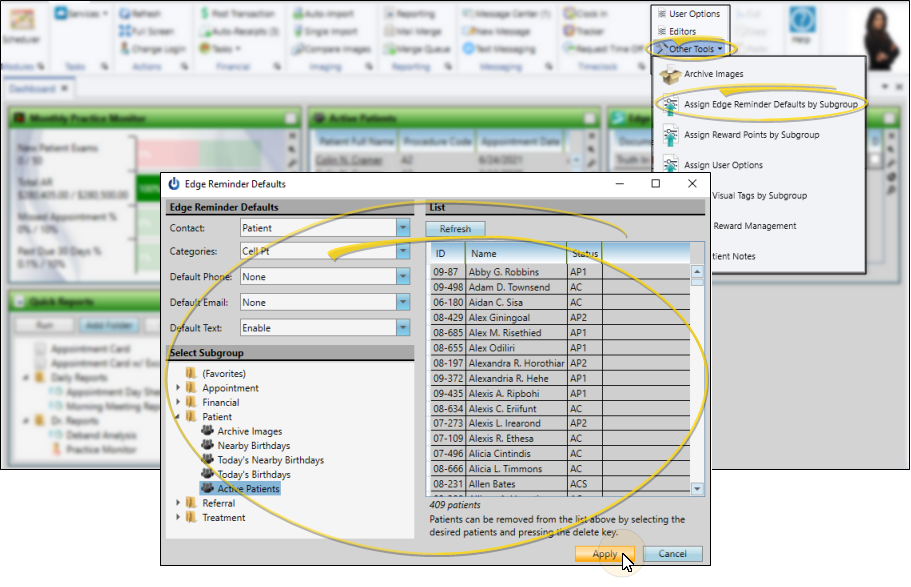
Apply Contact Flags to a Subgroup
You can enable / disable Edge Reminders contact flags for any subgroup of patients with the Assign Edge Reminders Defaults tool. You might use this, for example, to enable the Text Message flag for the Patient Cell contact type of all "Active" patients when you first start sending appointment reminder text messages. See " Apply Edge Reminders Contact Flags to a Subgroup" for details.
Show / Hide Reminder Icons on Scheduled Appointments
Click the Reminder Icons button from the View section of the Scheduler ribbon bar to quickly show / hide the display of Edge Reminders notifications. When enabled, you see these icons:
Appointment was confirmed. This happens when, during a phone reminder, the patient presses the number 1, or responds with the letter Y to a text message (with or without the accompanying appointment shortcode), or clicks the Confirm button in a reminder email. Appointment was canceled. This happens when, during a phone reminder, the patient presses the number 2, or responds with anything other than the letter Y to a text message (including adding quotation marks, or typing "Yes", or anything other than Y, and the supplies shortcode, if included in the message), or clicks the Cancel button in an email reminder. Phone reminder was answered by a person or voicemail, but no confirmation choice was made. This happens when your office leaves a voicemail message, or the patient hangs up without making a choice. Phone reminder was not answered, and no message was left. Patient left a voice message via Edge Reminders. This option is available for phone messages. Click the icon to hear the message. You can also hear the message directly from the Edge Reminders Sent Messages window.
Topics in This Section
- Apply Edge Reminders Contact Flags to a Subgroup
- Set Up the Edge Reminders Integration
- Set Up Contacts for Edge Reminders
- Set Up Edge Reminders Messages
- Set Up Scheduled Reminders