Post Bulk Payments
Use the Bulk Payment tool to post one payment to multiple contracts. For example, you would use the bulk payment tool when you receive an insurance check for several clients, or a parent's check covering multiple siblings. You can optionally assign a batch number to help track bulk payments.
Post Bulk Payments
-
Open the Post Transaction Window
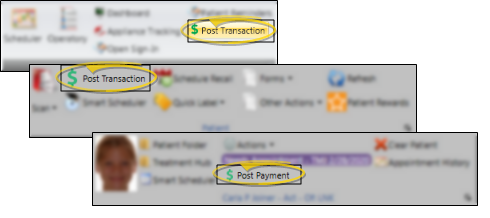
- Select Post Transaction from the Home or Patient ribbon bar, or select Post Payment from the patient section of the Scheduler ribbon bar. If a patient record is already active, that patient's information will be loaded automatically. Otherwise, you use Fast Find (either typing information or swiping a registered reward card) to search for the patient to work with. (You can also post transactions from the Quick Access toolbar at the top of your Edge Cloud screen, and by right-clicking a patient's appointment in your Scheduler.)
 caution
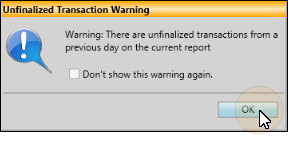
You can set up Edge Cloud so that when you attempt to post a transaction before you finalize the Transaction Report for the previous day, you see a warning message before the Post Transaction window will open. You must then confirm your action before continuing. This feature helps you maintain the integrity of daily transaction postings. After you have seen the message once, you can select not to see it again that day, if you choose. (See "Financial User Options" for details.)
 note
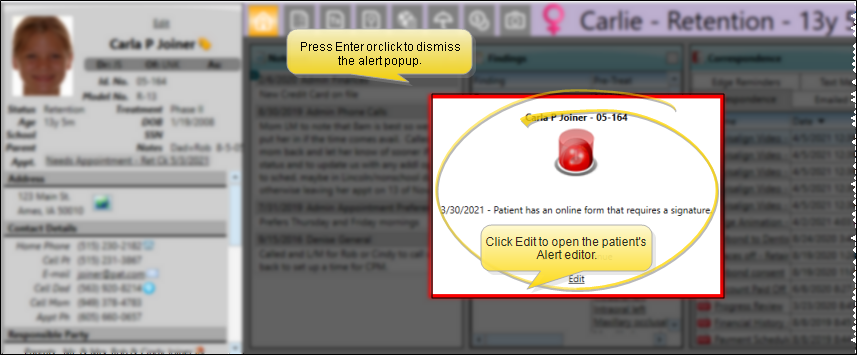
noteIf the patient has an alert trigger enabled for this feature, the Alert Stop pop-up window will appear when you initiate this feature for the patient. Review the alert information, then either press Enter on your keyboard, or click the box to continue. You can also click the Edit link to open the Alert editor for that patient. (If you have a patient folder page in a floating window, under certain circumstances the Enter key will not dismiss the alert popup window. In that case, you must click the popup window to dismiss it.)
-
Enable Bulk Payments
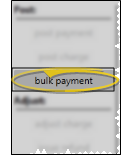
- Click Bulk Payment at the left of the Post Transaction window to begin posting a bulk payment.
-
Payment Account and Details
- Select the receipt type to use for this transaction, and enter the details as you want them to appear on your deposit slip. Be sure to enter the entire transaction amount here, and identify the office to use to post the payment. Then, click Begin to start allocating amounts to patient accounts.
noteYour financial security settings may limit or restrict you from changing the transaction posting date. See "System Financial Settings Editor" for details.
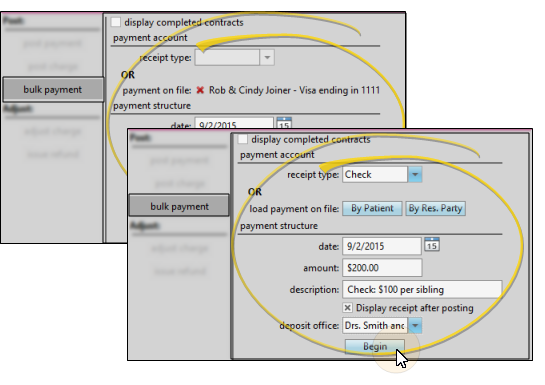
Payment Account - Choose the source of the bulk payment; either a payment account you have set up in Edge Cloud (such as an insurance payment check to split among multiple patients), or a Payment on File record you have entered for a responsible party (such as a credit card payment to split among multiple siblings). You can search for a Payment on File record by the patient name or responsible party name.
Payment Structure - Enter the date, the entire amount of the bulk payment, and a description of the transaction. Enable the Display receipt after posting option if you want to generate a printed receipt immediately after posting the transaction. Finally, select the office to use to post the payment.
-
Batch Number
- (Optional.) If you have enabled your system to accept batch numbers for bulk payments, type the number to assign to this payment into the batch number field, and click Ok to continue. (See "System Financial Settings Editor" for details about enabling/disabling the batch number option.)

-
Allocate Payments
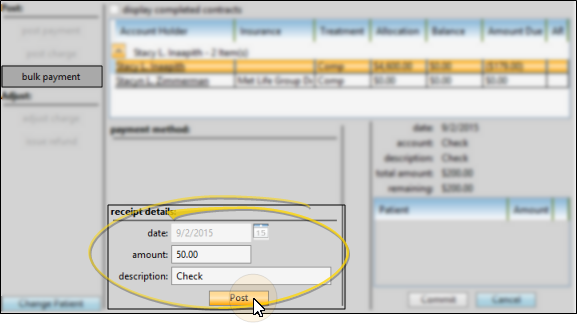
- Enter the portion of the total bulk payment amount to allocate to the currently selected contract, completing the receipt details fields just as if you were posting an individual payment. You may change the description for each allocated payment, if desired, or leave them all the same as the bulk payment description. Click Post to complete this portion of the bulk payment.
noteIf you are posting a bulk payment from an insurance company, be sure to select the insurance contract, which appears just below the responsible party's contract in the billing party list.
noteOnce you begin allocating a bulk payment, you can use your keyboard exclusively to complete the transaction: Press Tab to advance to the next field, Shift+Tab to go back one field, your arrow keys to move within a field, and Enter to click a button (such as Post). When you have finished entering the details for a patient, the bulk payment process highlights the Change Patient button for you, anticipating your next move.
-
Select Next Patient
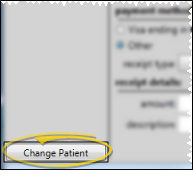
- Click Change Patient to locate another patient, continue allocating the bulk payment funds as described above.
-
Review & Commit Payment
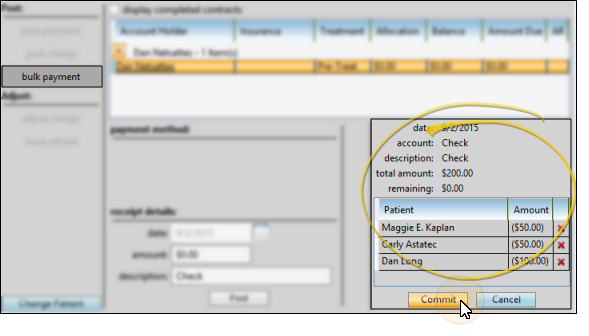
- As you enter individual transactions, you can review the progress toward the total bulk payment at the right of the window. If needed, you can click Delete to remove a payment you have entered. When you enter the transaction that fulfills the bulk payment, Edge Cloud asks if you are ready to complete the bulk payment and post all the transactions.
If you respond Yes to posting the bulk payment, the transactions are posted as you have allocated them. In addition, the receipt of payment form appears for a signature, if you have enabled it to do so.
If you respond No to posting the bulk payment, you may review the payment details at the right of the window and make changes as needed. When you are ready, click Commit to post the transactions as you have allocated them.
Bulk Payment Reporting
Bulk Payment on Deposit Slip - After you post a bulk payment, the deposit slip will include a single transaction for the entire bulk payment amount. However, the individual patient's accounts will show only their allocated portion of the bulk payment. See "Deposit Slip" for details.
Bulk Payment Report - Run a Bulk Payments report to review the details of bulk payment transactions. You can choose to include only bulk payment transactions for a specific range of dates, a specific total amount, a specific batch number, and / or a specific office. See "Bulk Payments Report" for details.
OOPS! I Made a Mistake
Use the Adjust Receipt wizard to transfer a posted payment to another account, fix an incorrect receipt amount, remove a payment that was returned for insufficient funds or reverse an unintentionally posted receipt. See "Adjust Bulk Payments" for details.