Edge Signature
Edge Signature provides a way for your mail merge documents to be digitally signed or initialed by one or more parties, including the patient, responsible party, orthodontist, professional, operator, and assistant. Once signed, a copy is retained in the appropriate correspondence history for a permanent record.
Add Edge Signature Fields to Mail Merge Documents
Add Edge Signature variables to your mail merge documents wherever you need a patient, responsible party, orthodontist, professional, operator, or assistant to digitally initial or sign the document.
-
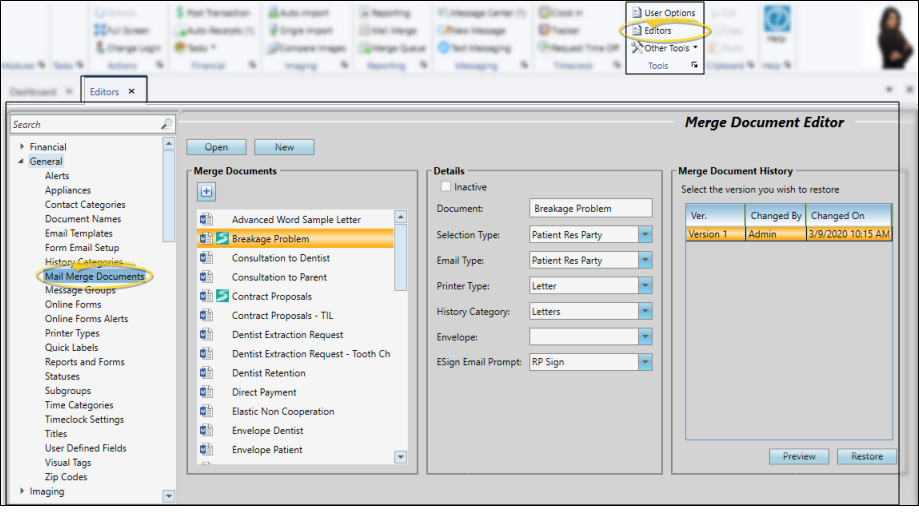
Open the Mail Merge Documents Editor
Select Editors from the Tools section of the Home ribbon bar. Then, from the General section, open the Mail Merge Documents editor. (You can also use the Search field to look for the editor you want to work with.)
-
Create or Edit a Document
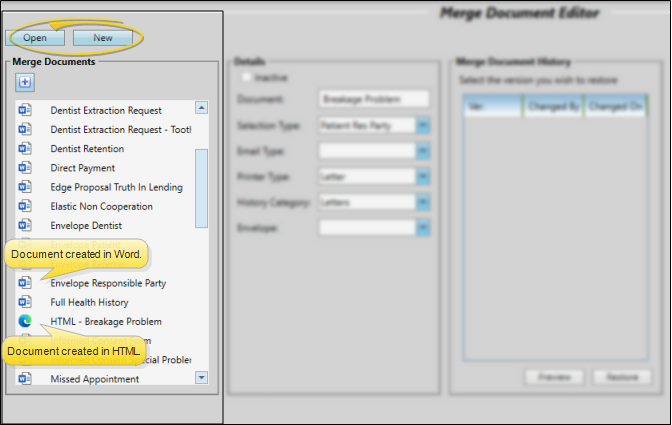
Open your Mail Merge Documents editor, then choose an existing document and click Open, or click New to create a new document. You can create documents with either Microsoft Word or with HTML. Existing documents created in Word are preceded by the Word icon. HTML documents are indicated with your primary browser icon (i.e. ).
-
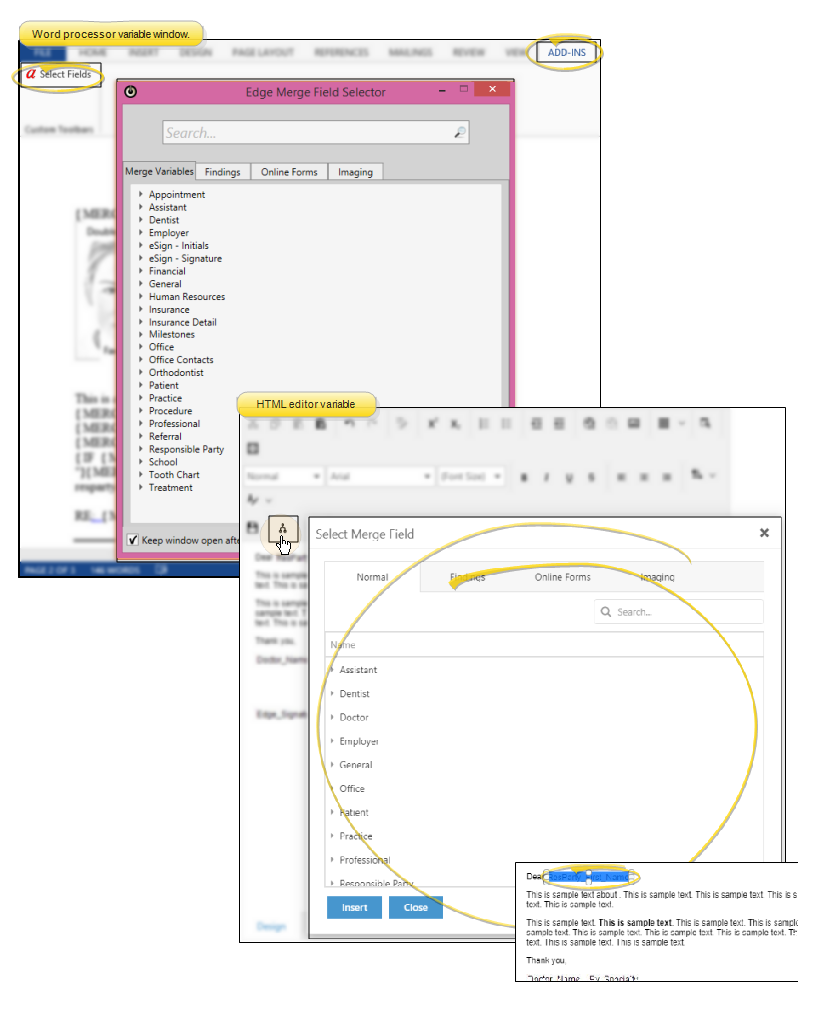
Open the Variable Menu
If you're working in your word processor, open the Add-Ins menu (if needed). Choose the Select Fields option to open a window of variable categories, most of which have subcategories. If you're working in the HTML Editor, click the Insert Merge Fields icon on the toolbar to open the window.
-
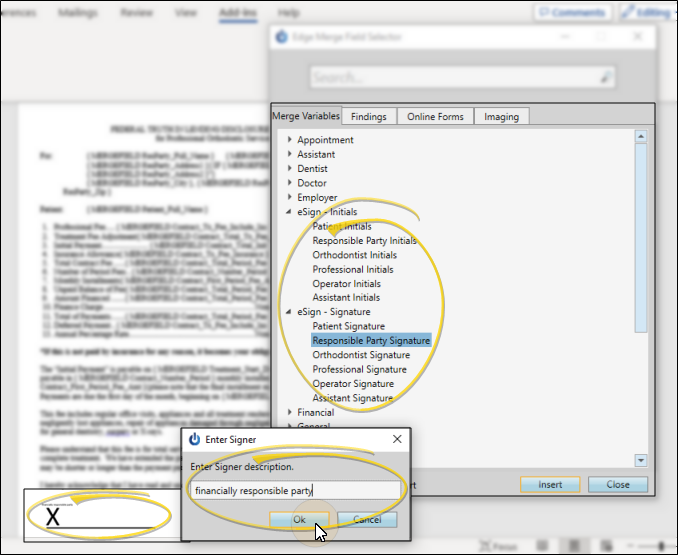
Insert eSign Placeholders
Choose the eSign - Initials or eSign - Signature variable that corresponds to the person that needs to initial or sign the document, and click Insert. Then type a description of the intended signer, such as "Patient", "Parent or Guardian", or "Doctor". Click Ok to insert the placeholder into the document. Once the signature placeholder is inserted, you may need to drag it to the appropriate location in the document. You may repeat the process to insert as many initials and signatures as needed.
-
Save & Exit
Click the X in the upper right corner of the document window. As you exit, you have the opportunity to save the document. When you return to the Mail Merge Documents editor, you will see a Signature icon beside the document name.
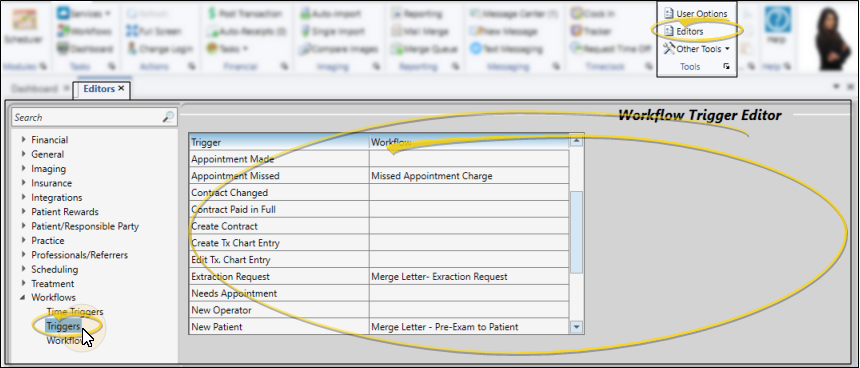
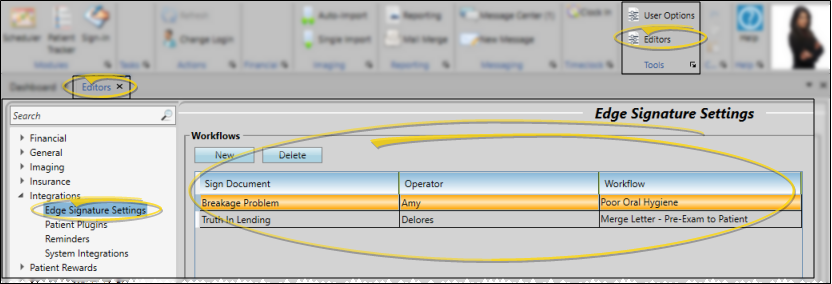
Assign Workflows
Use theEdge Signature Settings editor to assign workflows that you want to activate when a specificEdge Signature document has been signed. See "Edge Signature Settings Editor" for details.
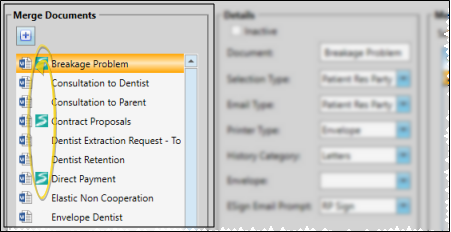
Merge Edge Signature Documents
Mail merge documents that support digital initials and / or signatures include an Edge Signature icon beside the name. When you merge one of these documents, you will be prompted to specify who should sign and / or initial the document. The document is then added to the list of Edge Signature documents waiting to be digitally signed.
-
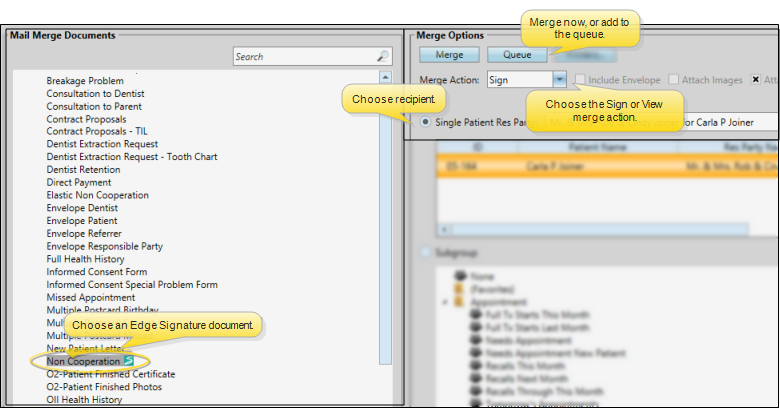
Select an Edge Signature Document and Recipient
Open Mail Merge from the Reporting section of the Home ribbon bar and select an Edge Signature document. Then choose the recipient, and select either the Sign or View merge action. Then choose Merge to merge the document immediately, or Queue to add it to your queue.
noteSingle Merge Only - You can merge only one Edge Signature document at a time: You cannot merge an Edge Signature document for a subgroup.
noteEither Sign or View Merge Action Required - Be sure to enable either the Sign or View merge action before selecting to Merge or Queue the document: If you select any other merge action, you will not be able to digitally sign the document. (The Sign merge action is available only if you have chosen an Edge Signature document.)
-
Specify Signature Details
If you chose the Sign action, and merge the document immediately, you will be prompted to the signature details. If you chose the View action, you will need to select Add Ins then Edge Signature to activate the signing feature. (See "View Mail Merge Documents" for detailsabout signing after viewing.) If you add the document to your Merge Queue, you will be prompted for these details when you complete the document processing.
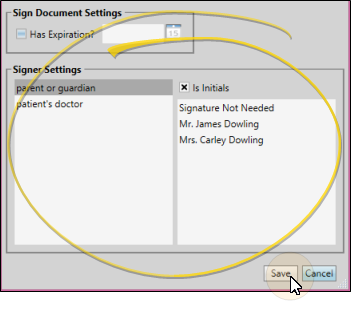
Expiration Settings - (Optional.) Enable the Has Expiration option, then enter the date the document will expire. If the document has not been digitally signed by that date, it will be removed from the list of pending Edge Signature documents. This feature is especially useful for time-sensitive materials, such as consultation forms and truth in lending agreements If you do not enter an expiration date, an unsigned document can remain in the Edge Signature queue indefinitely, or until you manually delete it.
Signer Settings - Use the Signer Settings section of the window to identify the people that need to sign and / or initial the document. You can also choose to "skip" a signature that is not required for this instance.
The left side of the window lists all of the Edge Signature initials and signatures required by the document. The descriptions are the prompts you typed as you inserted Edge Signature variables into your mail merge document. The Is Initials option indicates whether the variable you inserted was for initials only.
The list at the right of the window includes all the people associated with the patient folder that fit the type of initials/ signature you have selected at the left. For example, if your document calls for responsible party initials, all the responsible parties associated with the patient appear in the list, and the Is Initials option will be enabled. You can click to select the person who should provide the signature / initials, or select Signature Not Needed to "skip" this signature / initial location. This might happen, for example, if you have inserted an eSign - Signature variable for "mom", and another eSign - Signature variable for "dad", and the patient has only one parent.
Save Signer Settings - After you have selected or skipped the signer for each signature / initials location in the document, click Save (or, click Cancel to start over). Once saved, the document is added to list of Edge Signature documents in progress. If you have assigned an email template to the document, the message is immediately sent to the patient, responsible party, or other appropriate party, prompting them to read and sign the document.
If an email template has been applied to the document, an invitation to read and sign the document is automatically sent to the patient, parent, or other appropriate email address. The unsigned document is added to the correspondence history immediately, and updated to the signed version when that process is completed.
View and Sign Documents
Use the Edge Signature Service to view and sign documents in progress, as well as view completed documents.
Email Signature Invitations
You can provide responsible parties with an email that includes a link inviting them to sign their document. If your merge document is assigned to an email template, the email is sent as soon as you have merged the document. In addition, you can use the Edge Signature widget to send email links, or copy the link for use in a browser. Clicking the link will take the responsible party directly to the Edge Signature service, with their document open and ready for signing. They will only be able to see the document you have linked to them, and not any other document you have available in the service.
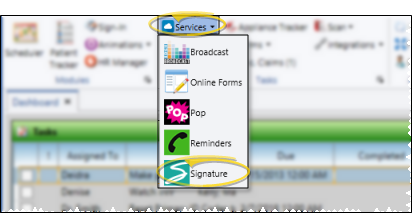
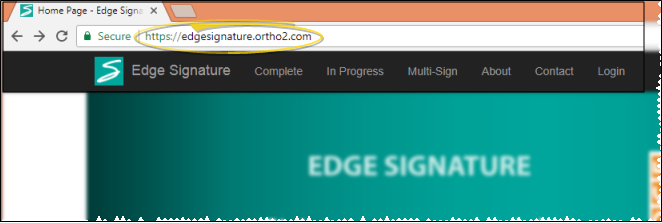
Open the Edge Signature Service
Home Ribbon Bar - Select Services from the Tasks section of the Home ribbon bar, and select Signature from the drop down options.
Web Browser - Navigate to https://edgesignature.ortho2.com. We suggest you bookmark this site for faster access.
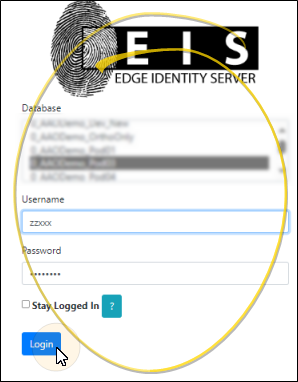
Log In
Before you use any part of the Edge Signature service, you will be asked to log in with your Edge Cloud credentials. You must have both an Edge Cloud operator username and password to use Edge Signature: If your office protocol does not require you to have an Edge Cloud password, you will need to update your Operator account to add one.
Keep Logged In Option - After signing a document, you are automatically logged out of Edge Signature so that others can log in and add their signature or initials to the documents as needed. However, if you are simply reviewing completed documents, or perusing the list of documents in progress, you can enable the Keep Logged In option to keep you logged in when you exit and re-enter the service. This requires cookies, so that Edge Signature can recall your credentials when you return to the service.
Sign a Document
Use the In Progress window of the Edge Signature service to view and sign pending Edge Signature documents. Most often, an iPad or similar tablet device is used for signing, because it can easily be handed back and forth between the doctor, parents, treatment coordinator, and others needing to sign an individual document.
If you have multiple document to sign, consider using Multi-Sign instead.
Email Signature Invitations
You can provide responsible parties with an email that includes a link inviting them to sign their document. If your merge document is assigned to an email template, the email is sent as soon as you have merged the document. In addition, you can use the Edge Signature widget to send email links, or copy the link for use in a browser. Clicking the link will take the responsible party directly to the Edge Signature service, with their document open and ready for signing. They will only be able to see the document you have linked to them, and not any other document you have available in the service.
-
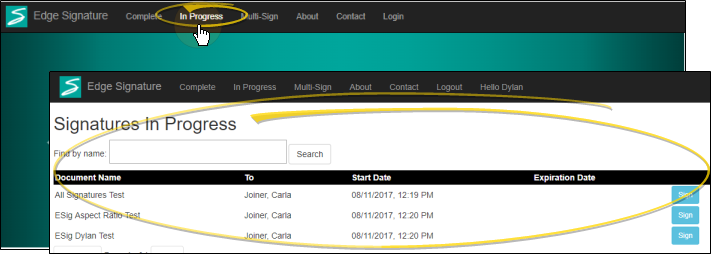
Choose the Document to Work With
Open the In Progress tab at the top of the Edge Signature window. Scroll through the list, or use the Search field to choose the document you want to work with. Then click Sign at the right of the document.
-
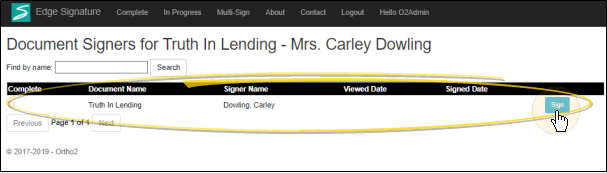
Choose a Signer
Select the signer to work with, and click Sign. The list also shows whether a signer has already opened the document, and completed their signature.
-
Sign the Document
The document opens on your screen. You cannot change any text, but be sure to review the contents before signing. When you are ready, click Sign and complete your signature / initials.
Tell me more...
Review the Document
After reviewing the document, click Sign to open the signature pad.
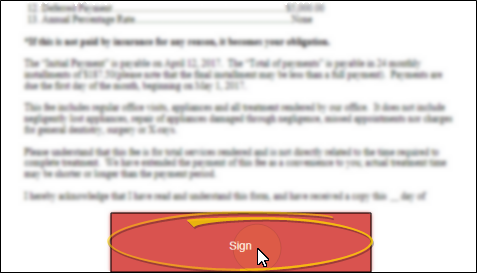
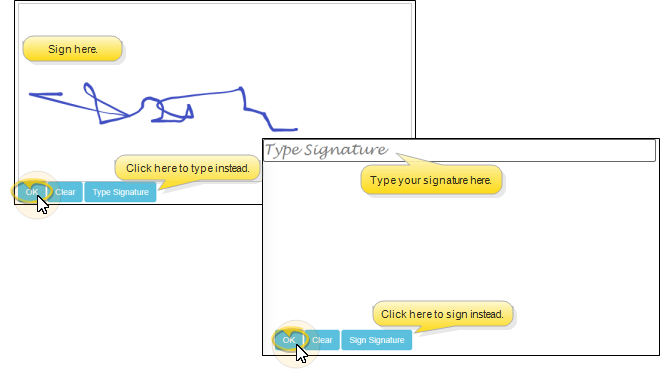
Sign or Initial
Depending on the type of device you are using, you may use your finger, a stylus, or another pointing device (such as a mouse) to sign the signature pad. If you prefer, you can click Type Signature, then type your signature or initials on your keyboard. You can toggle between signing and typing. When finished, click Ok at the bottom of the signature pad.
Save Your Signature
The document appears on your screen again, along with your signature. If you're satisfied, click Save at the top of the document window. You can also click the signature area to open the signature pad again and start over.
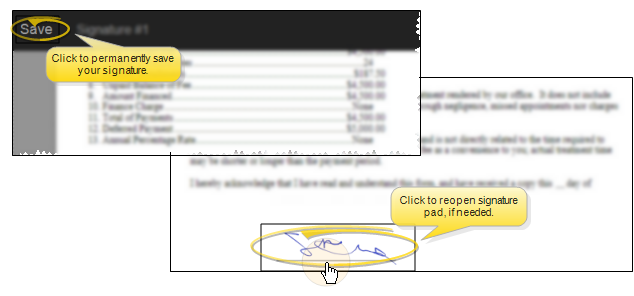
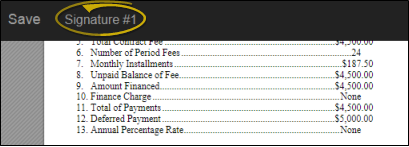
Additional Signatures / Initials
If you need to sign or initial the document in multiple places, a list of the signatures appears at the top of the window. Click a signature link to view and sign that area of the document. When you have completed all signatures, the document is flagged as being completed.
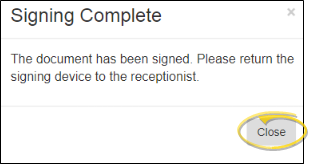
Finish
As soon as you save your signature (or all of the signatures required from you) you are prompted to close the document. You are logged out of Edge Signature so that the next signer, if any, can log in and complete their signature. When all signatures are complete, the document is updated in the patient's correspondence history. In addition, if a workflow has been assigned to this document in the Edge Signature Settings editor, that workflow is triggered at this time.
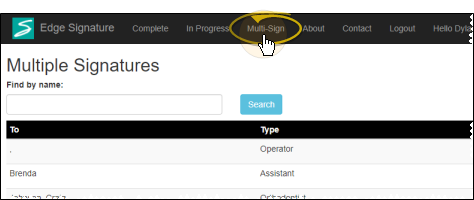
Use Multi-Sign
If you have multiple documents that need your signature or initials, you can choose to process all of them in one session. From the Edge Signature service window, open the Multi Sign tab and choose your name. Sign the document as described above. When you click Continue, the next document will appear for your signature. Continue until all the documents you need to sign are processed. If a document requires another signature, such as a second parent, it remains in the In Progress tab of the Edge Signature service.
Review Completed Documents
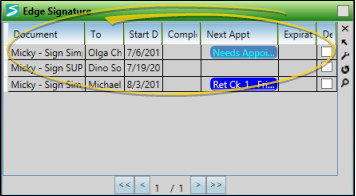
Open the Complete tab of the Edge Signature service to review documents that have all signatures. The list includes the signers' names, the date the document was first merged, and the date the signature(s) were obtained. You also see the patient's next appointment date.
Signed documents will appear in the patient and / or responsible party correspondence history, in PDF format. You can double-click to open the document. To obtain a paper copy, first open the document from the correspondence history, then print it to a printer available to your workstation. See "Patient Correspondence History" for details.

Edge Signature Widget
Use the Edge Signature widget to digitally sign documents, send email invitations for signatures, and review complete and deleted Edge Signature documents. See "Edge Signature Widget" for details.