Custom Labels
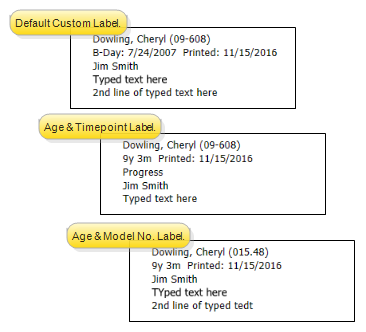
Run a Custom label to generate customized labels for your patients. Coose from the Default format, which auto-fills with the patient's name, identification number, birthdate, attending orthodontist, and any medical alerts, the Age & Timepoint format, which auto-fills the label with the patient's name, identification number, age, latest imaging timepoint, and attending orthodontist, or the Age & Model Number format, which auto-fills with the patient's name, model number, birthdate, attending orthodontist, and any medical alerts. You can easily overwrite any of the fields before printing the label. Please contact Ortho2 for a list of approved label forms and printers.
Open Custom Label Window
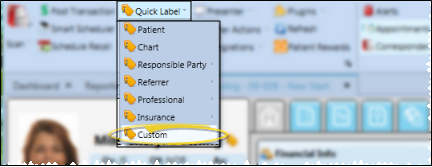
Open the patient folder, then click the Quick Label icon that appears beside the name in the Patient Information Panel or on the Patient ribbon bar and select to print a Custom label for that person. The contents of this label is the same as the "QL" label available from the Reporting window. These labels print on single-column label paper.
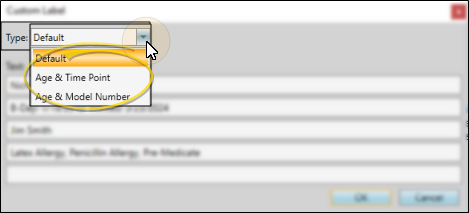
Choose the Label Type
Choose to auto-fill the label with the Default format, which includes the patient's name, identification number, birthdate, attending orthodontist, and any patient alerts, the Age & Timepoint format, which includes the patient's name, identification number, age, latest imaging timepoint, and attending orthodontist, or the Age & Model Number format, which includes the patient's name, model number, age, attending orthodontist, and alerts.
Edit Text
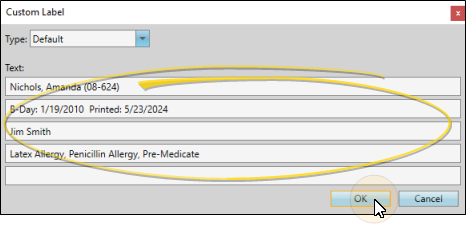
Although the label auto-fills with information from the patient folder, you can edit any of the text before printing the label. Your customized text is used for this print job only.
Finish
Click Ok to continue. Then select your Quick Label printer, and confirm the number of copies you want to print. Finally click Ok to initiate the output.