Patient Sign-In
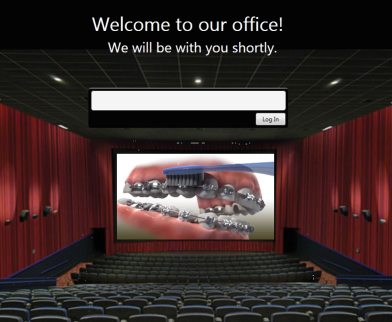
Use Patient Sign-In to provide a way for patients to check into your office when they arrive for an appointment. Patients can use a keyboard, fingerprint sensor, their patient reward card, or a touch screen to complete the sign-in process.
If needed, your staff can bypass the Sign-In screen and sign a patient into your office at any computer station. (See "Staff Sign-In Options" for details.)
You can optionally allow patients to sign in for their appointment with your Practice Connect app when they come within a certain distance of your office, and within a certain time before they scheduled appointment.See "Practice Connect" for details.
Get Started
Generally, you can start the Sign-In application on your Patient Sign-In station, and leave it active until the end of the day. You can open this feature in multiple ways: Use the method that's most convenient for you.
Open Patient Sign-In From Edge Cloud
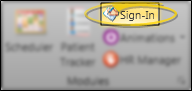
- Home ribbon bar > Modules Section > ![]() Sign-In.
Sign-In.
Automatically Launch Patient Sign-In - You can also start Patient Sign-In automatically, or with a desktop shortcut. See "Set Up Patient Sign-In Station" for details.
Use This Feature
-
Initiate Signing In
- Depending on how you have set up your greeting screen, patients can check in at your sign in station in several ways. Be sure your greeting screen includes clear directions for each method. ( See "Set Up Patient Sign-In Screen" for details.) If you restrict sign in to a specific office, and a patient with an appointment scheduled for a different office attempts to sign in, that patient will see your "No Appointment" message, and is not allowed to sign into your office. See "General Sign-In Settings" for details.
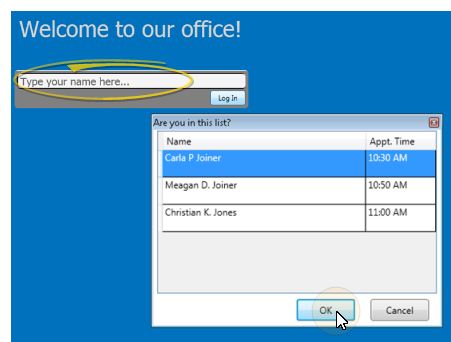
Type name - If you have included a sign-in prompt on your greeting screen, you can type two or more letters of the patient's first or last name in the prompt field and click or touch the Log In button. If multiple patients match the name you typed, you see a list of those names. The patient name always appears in this list, along with an optional additional field for identification purposes. If a patient has multiple appointments scheduled for today, the patient will be listed multiple times. The first listing corresponds to the earliest scheduled appointment, and so on. Select the patient's name, if needed, and choose Ok to continue.
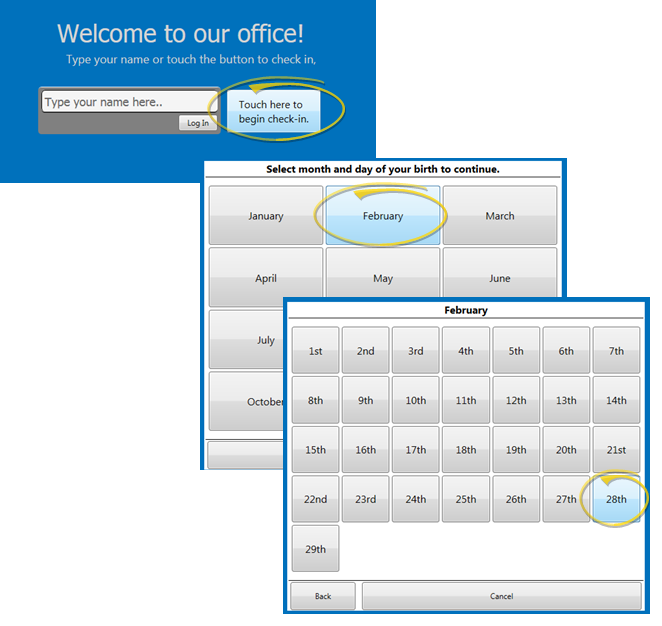
Use touch screen - If you have included a sign-in button on your greeting screen, patients can check in by touching the button. They then choose their birthday month and day to complete the sign in process (or optionally swipe their reward card, as described below).
Swipe reward card - If you have a card reader installed at the patient sign-in station, patients can check into your office by swiping their reward card. (See "Reward Cards" for details.) If your sign-in screen has a touch screen sign-in button, and not a sign-in prompt, the card swipe option must be enabled for the sign-in button (See "Set Up Patient Sign-In Screen" for details.) When patients arrive at your office, they must first press the sign-in button. Then, when the birthday month selector appears, they can swipe their reward card.
Use fingerprint - If you have a fingerprint sensor installed at the patient sign-in station, patients can check into your office by pressing the sensor with their right index finger. (See "Acquire Patient Fingerprints" for details.)
-
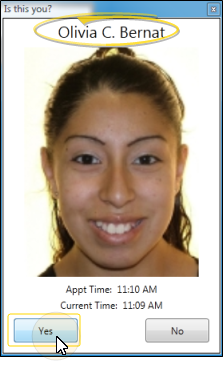
Confirm Identity
- The patient information, including the name and appointment time, appear to help confirm the identity. If a patient nickname exists, that name is displayed along with the last name. Otherwise, the first and last name are displayed. To complete the sign-in process,click or touch Yes. Patient alerts, notifications, and sounds may be triggered after the patient is confirmed. Read the messages that appear on the screen, then select Ok to continue. (See "Get Started with Patient Sign-In" for details.)
-
Closing Message - When your closing message appears, the patient has successfully signed into your office, and will appear in your PatientTracker.
More Information
Patient Rewards Points
- (Optional.) You can set up your system so that patients earn points toward your Patient Rewards program when they sign in on time (or early), and lose points when they sign in late. When patients earn points for signing in on time, they see the newly acquired points and their point total at the end of the sign in process. See "Patient Reward Trigger Editor" for details.

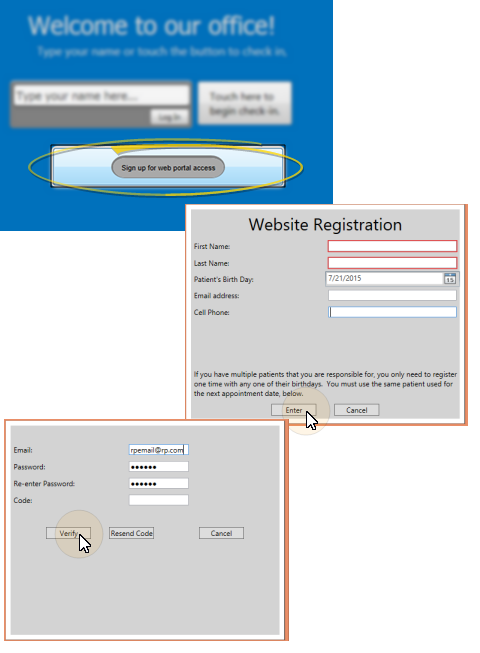
Edge Portal Registration
- (Optional.) If you have Edge Portal Premium, you can include a web sign up button on your sign in greeting screen. Then, from your Patient Sign In station, responsible parties can click the web sign up button. To register for access to the parent section of the portal, they simply supply their own first and last name, the patient's birthdate, an email address, and phone number.
You can alternately use the Register for Portal icon from the Responsible Party ribbon bar to register this party for Edge Portal. See "Responsible Party Records" for details..
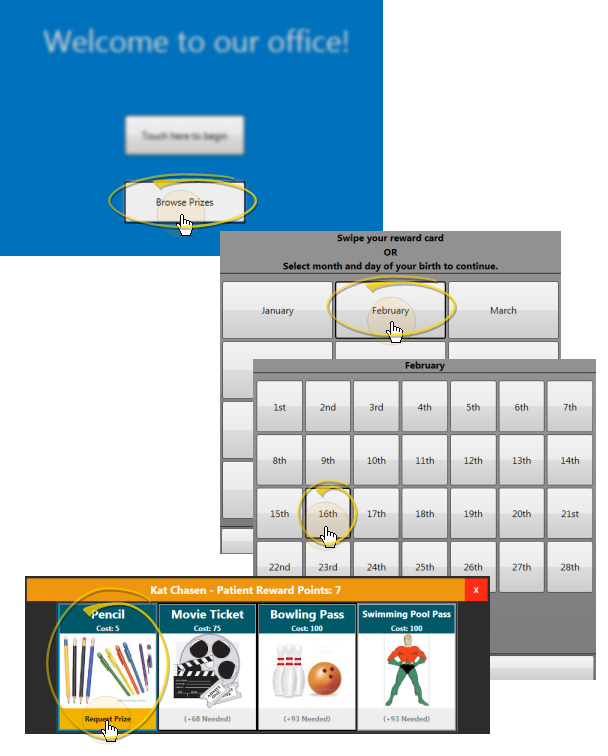
Patient Prize Selector
- (Optional.) If you have included a Prize Selector button on your sign in greeting screen, patients can press the button, then either swipe their card (if enabled) or enter their birthday month and day to review their reward point total, browse prizes, and select a prize, which triggers the pending prize process. (See "Patient Rewards Prize Selector" for details.)
Exit Patient Sign-In - Generally, you can leave Sign In active on your Patient Sign-In station all day. Then, at the end of the day, type your sign In password at the patient prompt and press Enter. Or, you have no sign-in prompt, you can press Ctrl+Q on your keyboard, then enter your sign in password to exit the sign in screen.
Sign-In Icons - Once a patient signs into your Patient Tracker system, your scheduling screen indicates the operatory status of that appointment. (See "Your Scheduler" for details.)