Sign-In Confirmation Settings
Use the Confirmation tab of your Sign-In Settings editor to set up the messages and optional image your patients see as they complete the patient sign-in process. These settings are workstation-specific: Other workstations in your Edge Cloud system may have different settings.
How to Get Here
-
Open Sign-In Settings
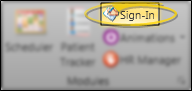
- Home ribbon bar > Modules section >
 Sign-In > Password > Log In > Main > Settings.
-
Open Sign-In from the Modules section of the Home ribbon bar.
-
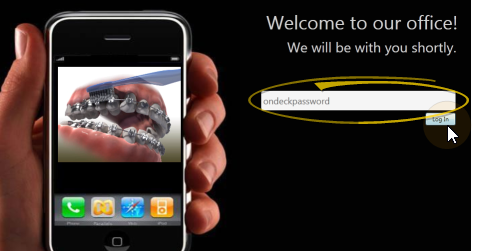
Log into Patient Sign-In editing mode with your sign-in password. (If you have not set up a password yet, just press Enter at the login prompt.
-
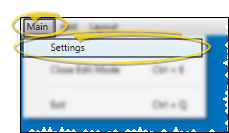
Click Main on the editing ribbon bar and select the Settings option.
noteIf you do not have a sign-in prompt, you can press Ctrl+E on your keyboard and enter your sign-in password to enter editing mode.
- Home ribbon bar > Modules section >
-
Open Confirmation Tab
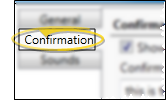
- Click the Confirmation tab at the top of the Sign-In Settings editor.
Choose Your Settings
Patient Photo
- Enable this option to include an image of the patient on the confirmation screen. Patient photos are available only if you use an integrated imaging system, such as Edge Imaging. When the photo option is enabled, your default image type is displayed. (See "Image Types Editor" for details about choosing a default image type.) Otherwise, a photo is omitted.
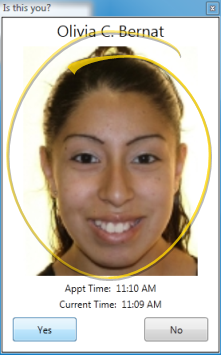
Enable patient photo option in your Confirmation properties.

Patients see the photo as they sign in.
Patient Confirmation Prompt
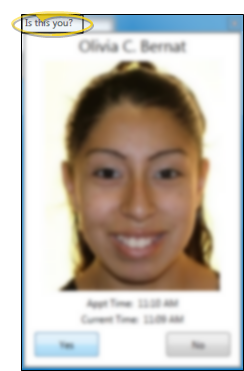
- Type a message that prompts your patients to confirm that the displayed information is theirs. We recommend the default prompt Is this you or something similar.
Type your patient confirmation prompt.
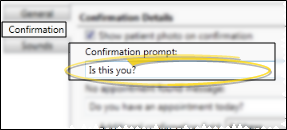
Patients see the prompt at the top of the confirmation window as they sign in.
No Appointment
- Type a message to display when a patient that does not have an appointment scheduled for today attempts to sign in. We suggest Check with our front desk person please or something similar.
Type your no appointment message.
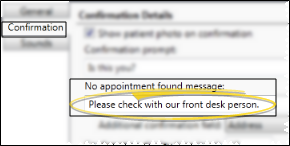
Patients without an appointment today see the message when they attempt to sign in.

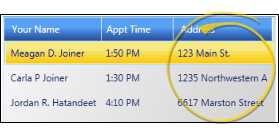
Additional Confirmation Display Field
- You can display an additional field of information in the list of matching names that appears after the patient types his or her name into the Patient Sign-In prompt. Select Address, Birthday, Phone number, or None. This setting helps avoid the confusion that could result from multiple patients with identical or similar names.
Select the additional field to display.
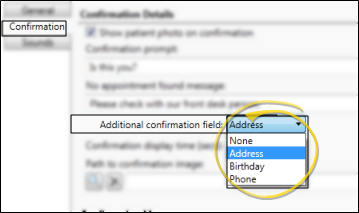
Patients see the additional information if the name they type matches multiple patients.
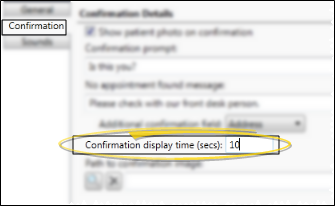
Confirmation Display Time
- Enter the approximate number of seconds to wait before progressing past the closing message. Due to the differences in computer speeds and other factors, you may need to experiment with the value before it is perfectly adjusted for your practice. The default interval of 15 seconds is used if no number is entered.
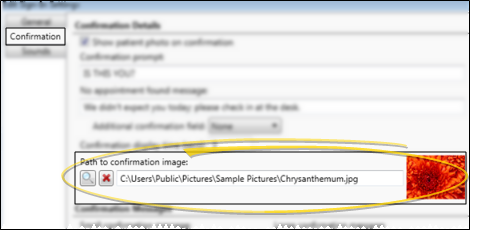
Image
(Optional.) Click Browse and select a picture to use as the background of your screen. To remove a picture, click the beside the path field.
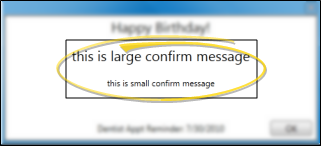
Confirmation Messages
- Type a primary and secondary message for your patients to see as they complete the Patient Sign-In process.
Set up your confirmation messages at the bottom of the Confirmation tab.
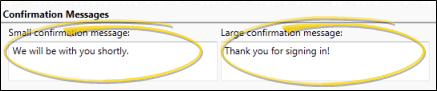
Patients see the messages as they complete the Patient Sign-In process.
Save Your Changes - Click Save to save the changes you have made and close the editing window.